
Making money on taking pictures – sounds great right? But before you buy the most expensive camera you can find and start shooting, you should familiarize yourself with some aspects of the business. Here are some awesome tips on getting started with stock photography:
1) Learn to take sharp shots
What do we mean by sharp? We mean tack sharp. That means at 100%, your image does not look blurred, too noisy, or pixelated. Take a look at this photo:

Looks sharp right? But lots of images look sharp when you zoom out. To really check it from a professional standpoint, you need to zoom in – like this:

This may be okay for a personal photo, but when it come stock photography, this is not acceptable. You have to give clients the biggest margin of sharpness so that they can resize the media, print it, or do whatever they want. Take a look at this photo:

This probably looks just as sharp as the previous one – so let’s zoom in:
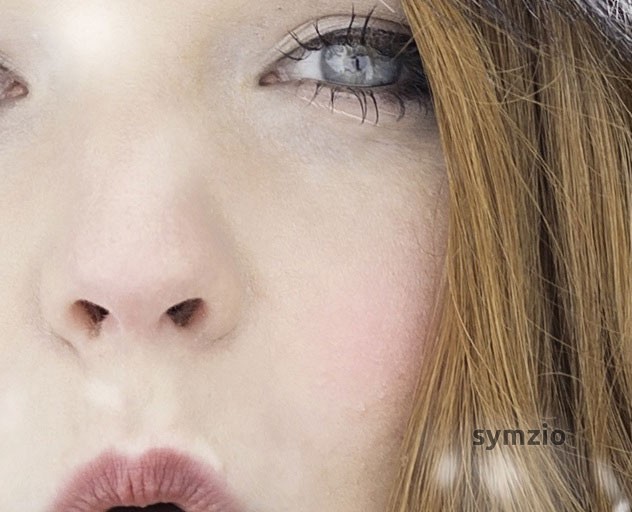
Now, although one could say it could be sharper, this is sharp enough. You can make out hairs inside her nose, her eyelashes are separated clearly, and even the makeup can be distinguished. As you can see, it is actually impossible to determine if an image is sufficiently sharp from a zoomed out perspective. Before you click that shutter, it helps to zoom in using your camera’s digital LCD, especially when you don’t entirely trust your autofocus or are operating with manual focus.
2) Maximize dynamic range (not too bright, not too dark, white balance)
Dynamic range sounds complex, but it’s really simple. Make as many pixels as possible span as many colors and shades as possible. What do we mean by that? If you look at a color spectrum:
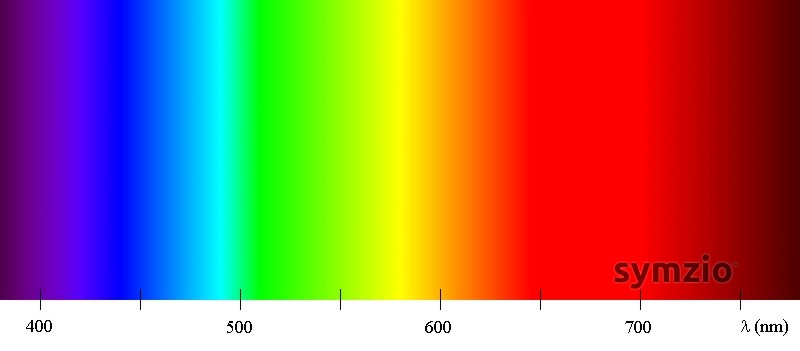
You quickly see how many different colors there are, and how many different shades of them exist. Maximizing dynamic range means ensuring that your image expresses as many colors and their shades as possible, staying true to the image. Here is an example of an image that is underexposed:

It doesn’t look half bad, and could even be interpreted artistically. But the trained eye can tell that the whites are not bright enough and the darks are too dark. Too much of the image lies in the dark end of the shades, and it could be fixed better. Here’s the same image, overexposed:

Again, artistically viable, but look at the whites – they are really bright, even though you have some dark areas too. Most importantly, look at the detail that is lost. Compared to the top image, you see that this area above the mushroom:

and this area in the top right:

Have both lost a great deal of detail: a lot more of it is lost to the bright shades, almost appearing white, giving the image less dynamic range. Finally, here’s the original:

This image may actually look more ‘boring’, but as you peruse around it, you start to notice that there’s a lot more detail in different areas. You can make out the shadows, the greens, even the mushroom a lot clearer. To a professional, this image is actually more exciting, because there is more detail with which to play with. If they want to overexpose or underexpose to stylize it as per their use, you’ve now given them that choice. But if you choose how to stylize it for them, you are forcing it to fit one specific model. And once you get into post-processing images, you’ll soon learn that everyone likes to make their media look different from each other.
Finally, we’ll quickly touch on white balance. Here’s the same image, leaned towards the warmer yellows:

And here it is leaned towards the blues:

As you can see, the original was already quite warm, because the blue image above here actually looks like it presents more dynamic range than even the original does. You can tell when you look at the greens – they look more true to green, and the whole image has less of a yellow hue. Post processing images warmly is sometimes just fine – it adds to a certain look. Doing it too blue will rarely look as natural. But in the above examples, we prefer the last image that has been leaned into the blues because we like the way the greens look, and prefer to let the purchaser warm it up if they want. This provides for a really nice and colorful image with the widest dynamic range.
Note that this image is not suitable for stock photography as too much of it is out of focus.
3) Framing
Unlike the previous two tips, framing is not so straight forward. However, there is one general guideline you can work with – the Rule of Thirds. Simply put, the rule of thirds splits your image into 9 cells, and your goal is to align the most important part of your image with one of the vertical or horizontal lines, or places where they intersect:

Seems a bit strange at first. But as you start framing media, you’ll start seeing that it actually drastically improves the feel of your image. Here are some more examples, framed with the rule of thirds (and some without) (you can even look above to see that the mushroom is in fact running along the left vertical line):


As you can see, it works as a guideline, but ultimately use your own judgment to make it stick out as per the subject matter. Also note that isolated shots (images of items on pure white) do not generally require much specialized framing.
4) Subject matter
There are no specific tips we can provide you with regards to this. There is no magic formula to coming up with images, nor is there a set type of image that sells well, or more, than any other. The stock industry is always changing, and it is up to each individual photographer to find out what they have access to, and what they can find interesting to keep taking pictures of. This is likely one of the most difficult things to start with, because you don’t yet know what sells, have not tasted success, so you don’t know what to go with. A great idea is to start with what you know – look around you and take pictures of every day items, isolated or not, and try adding creativity to the framing. Maybe after getting a sale or two you will feel inspired and that will encourage you to find your niche.
The best thing to understand is that successful stock photographers will not share their subject matter with you, because you then become a direct competitor. You need to find your own specialty, and you can surely browse other photographers’ portfolios on agencies to try to emulate them.
5) Selling your stuff
Finally, we get to the good part. Where do you sell your stuff once it’s ready to go? Well, you’re in luck, because the market is getting real open in this regard. Firstly, there are a number of big agencies:
Shutterstock, Fotolia (Adobe Stock) and Pond5 to name a few.
With big agencies, you have to first apply to become a contributor and then upload media which must then be passed by their inspectors. Here is an analysis of some of the pros and cons of selling with big agencies:
Pros:
- Established market – they will find you customers
- No maintenance – once you upload your media, you’re done
- Less liability – although you’re liable to the agency, the agency deals with customers
Cons:
- Very low payouts – expect to make about $0.25 per sale.
- Low sales – expect to sell about half a percent of your images each day. This may be higher or lower depending on your subject matter and quality of images, but it is generally accepted that this number will continue to decrease as agencies get more and more saturated.
- Frustrating review process – many agencies take a long time to review items, can often reject items incorrectly, and wastes both time and effort in forcing you to re-upload stuff.
- Uncertain future – agencies are notorious for altering the conditions for photographers, almost always to their detriment. This can include lowering your revenue per sale, changing the terms of the licensing, and even kicking you out.
- Customers pay hefty premium – often customers pay agencies much more than three times the amount for an image than what the contributor receives.
- Poor interface – most agencies have reasonably unfriendly interfaces, making organization and changes difficult.
The second option, which you can do concurrent with working with big agencies, is launching your independent site. This is where we encourage contributors to go, and where Symzio shines:
Pros:
- You retain full control – pricing, licensing, and the media you sell.
- Direct contact with customers – you can build personal relationships with customers, which they often prefer.
- Large contributor community – the Symbiostock community is massive and is filled with positive, helpful professionals
- High revenue share – you retain everything from your independent site, and a majority of the revenue from Symzio.
- Stability – once you start getting sales on your independent site or through Symzio, that is less likely to fluctuate.
- Customers pay no premium – compared to big agencies, through your independent site or Symzio customers will pay nearly half, and you will make at least double the revenue
- Easy interface – the Symbiostock interface allows for searches, categorization and bulk edits.
- Benefit from community efforts – your sales will increase as other contributors promote Symzio
Cons:
- You do all the work for your independent site – you have to create your site, market it and manage it.
- Currently low sales – as the independent effort is very new, all contributors involved have to work hard to get us established. This is why we recommend working with agencies while you market Symzio and your independent site.
One Response
New Blog for stock photographers Backyard Silver
[…] started a new blog aimed at stock illustrators and photographers and a recent post caught my eye: 5 Tips on becoming a stock photographer! I’m sure many of the readers of my blog will know most of these, but a refresher is always […]